Overview
- Summary
- Tips & Ideas
- Get Started
- Store Setup/Management
Setup Tab
- Summary
- General Settings
- Payments
- Taxes
- Shipping
- Multi Language Stores -
FAQs
Catalog Tab
- Summary
- Category Setup
- Product Filters
- Product Variants
- Add a Product
- Clone a Product
- Import/Export Products
Site Content
- Summary
- Custom Pages
- Adding News
- Viewing News
- Product Ratings/Reviews
Marketing Tab
- Summary
- Cart Discounts
- Discount Coupons
- Newsletter
- About Froogle
- About Shopping.com
- Survey Questions
at Checkout
- Banners
- About IntelliContact
- About Del.icio.us
- Product Promotion
- Search Engine
Optimization
- Multi Language Stores -
FAQs
Reports Tab
- Summary
- Sales Reports
- Website Statistics
Orders Tab
- Summary
- Order Management
Stock Tab
- Summary
- Product Stock Record
- Quick Product Stock
Guide
Members Tab
- Summary
- Online Store Members
- Add a Member
- Newsletter
- Export Store Members
Other
- Getting Help
- Setup
your Email Accounts
Adding News Documents |
||||||||||||
| Magnet
Commerce |
||||||||||||
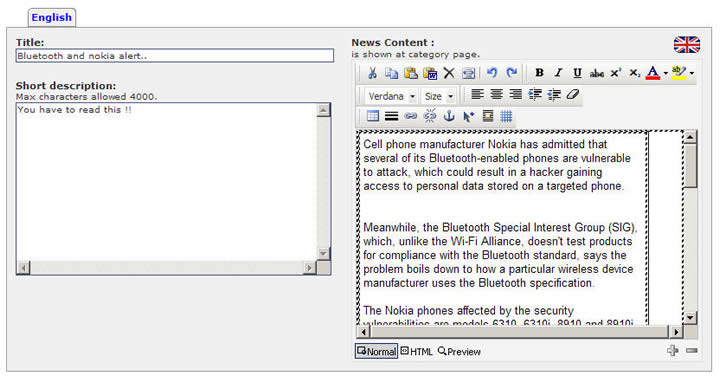
Title: Provide a title for your article Short description: Provide a short description for your article that will appear on pages listing the article News content: Compose
the article using the editor provided. • The advanced toolbar contains buttons for:
• Alternatively, right clicking in the text editor box gives a menu with numerous options for inserting, text editing and formatting. For example, using the insert tab, you could insert images, videos, pdf documents etc. • You can also view or edit the html
code of the article by choosing the html view button, at the
bottom of the editor, and check the article layout using the
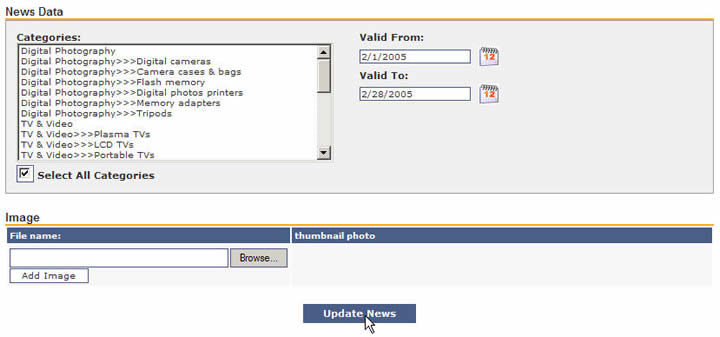
preview button. Once you have provided a title and composed your document you will need to define the pages and dates for which it will be published on your store. You can also add an image that will appear right under the document's title:
Categories: Select the categories under which the current article will be listed. Select All Categories: Tick this box if you want the article listed on all pages of your e-store. Valid From -To: Define the period for which the article will be published on your online store. Image: Upload an image for your article. This will appear right under the article's title. Update news: Click this
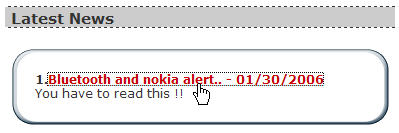
box to publish the article on your online store. Once published, your document will get listed on the pages of your online store as you have defined. The title of your document will link to the full document page.
|
|
|||||||||||


